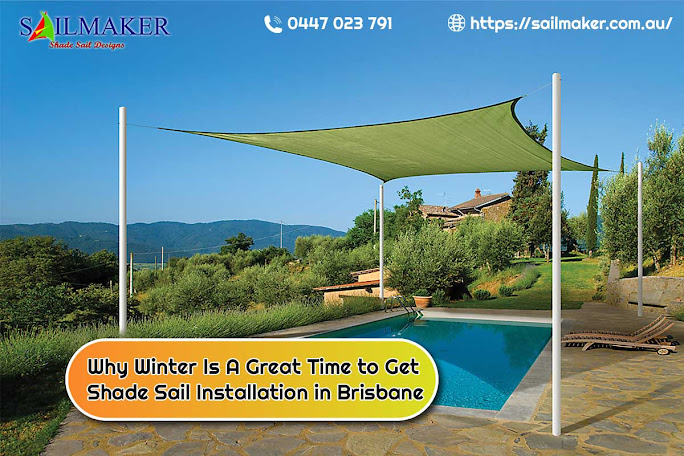
Sail Shade Setup: Install It Right the First Time
What is a Sail Shade Setup?
A sail shade setup involves stretching a tensioned fabric canopy between fixed anchor points to create durable, stylish shade over outdoor areas. Whether you refer to it as a sail shade installation or a sail shade setup, the core principles are the same: correct planning, secure hardware, and even tensioning. This sail shade setup guide is designed for homeowners and DIYers who want to get it right the first time — safely, correctly, and without costly mistakes.
Popular across Australian homes, schools, and commercial spaces, a well-executed sail shade setup delivers up to 98% UV blockage, a clean modern aesthetic, and a genuinely cost-effective alternative to permanent pergolas or roofing. Whether you're shading a patio, pool deck, or entertaining area, the right shade sail transforms a space you avoided in summer into one you actually want to use.
But here's the thing most people don't realise: the shade sail itself is only half the job. How it's planned, measured, and installed determines whether it lasts one season or ten.
This guide walks you through every stage of the installation: the tools and materials you need, sail shade layout design principles, step-by-step mounting instructions, correct tensioning, surface-specific methods, ideal drainage angles, and an honest look at when a custom sail shade — or professional installation — is the smarter choice.
⚡ Sail Shade Setup — Quick Steps
- Plan your layout: measure the area and map out your anchor points and height differences
- Mark all sail shade mounting points on your chosen surfaces
- Install marine-grade hardware at each fixing point (eye bolts, pad eyes, dynabolts)
- Attach each corner of the sail using stainless steel D-shackles
- Tension evenly using turnbuckles until the fabric is firm, taut, and slope-angled for drainage
Can You DIY Your Sail Shade Setup?
Short answer: Yes — a DIY sail shade setup is practical for simple residential installations with existing anchor points. However, larger sails, post footings, high-wind zones, and commercial sail shades Brisbane projects carry real structural risks and often require professional expertise.
Installing a shade sail isn't like putting together flat-pack furniture. It's closer to light structural work — you are dealing with load-bearing fixings, tension forces that can exceed hundreds of kilograms per corner, and drainage engineering. Getting it right matters for both safety and the lifespan of your investment.
That said, for the right scenario, a confident DIYer can absolutely complete a sail shade setup in a single day. Here's when DIY works well — and when it starts to get risky.
✅ Works Well When:
- Small to medium sail (3×3 m – 4×4 m)
- Existing strong anchor points (walls, beams)
- Solid surfaces (concrete, brick, structural timber)
- Standard residential patio or backyard
- Confident DIYer with common tools on hand
⚠️ Carries Risk When:
- No existing anchor points — posts + footings needed
- Large sails generating massive tension per corner
- Tensioning is off: sagging or over-tightened
- Sail installed flat with no drainage slope
- High-wind exposure zones or elevated sites
Four Risk Scenarios That Deserve Close Attention
Most homeowners only discover these problems after the first rain — when the sail is sagging, water is pooling, and the anchor hardware is starting to pull away from the wall. A little awareness upfront saves a lot of frustration later.
Bottom line: a DIY sail shade setup is realistic for simple residential projects — but it is frequently underestimated. We've seen homeowners spend a weekend installing a sail only to take it down a month later because the anchors were pulling out. For large sails, new post installations, or commercial sail shades Brisbane projects such as schools, childcare centres, and outdoor dining precincts, professional installation from a team like Sailmaker is the safer, more cost-effective long-term choice.
Sail Shade Setup: Tools and Materials You Need
Before starting, gather all tools and materials. A proper setup starts with using the right hardware — cheap or undersized fittings are the single fastest way to turn a simple project into an expensive repair.
- Power drill & masonry bits
- Tape measure & chalk line
- Spirit level
- Ladder (appropriate height)
- Spanner & socket set
- Safety glasses & gloves
- Shade sail (correct size for your space)
- Stainless steel mounting hardware
- Eye bolts or pad eyes
- Turnbuckles or tensioning devices
- Shade sail poles (if required)
- Concrete anchors or dynabolts
Choosing the Right Shade Sail Before You Buy
Before you think about installation, you need the right product for your space. This is where a lot of buyers go wrong — they pick a sail based on price or size availability rather than what actually suits their anchor layout, sun direction, and intended use.
Size and shape matter more than most people realise. The most common mistake is buying a sail that's too large for the planned anchor points, or choosing a square shape when a triangle would provide better coverage for an awkward corner. Measure your anchor span first, then choose a sail — not the other way around.
Fabric quality directly affects lifespan. Not all shade cloth is equal. Look for a UV-stabilised, high-density polyethylene (HDPE) fabric rated for outdoor use — typically 185–340 GSM depending on the application. Lighter fabrics cost less upfront but degrade significantly faster in harsh Australian sun.
Standard vs custom: which do you need? Off-the-shelf shade sails come in fixed sizes and shapes. They work well for simple rectangular or triangular spaces with standard anchor distances. But if your space is an irregular shape, has non-standard distances between anchor points, or requires a specific colour or heavier-duty fabric, a custom sail shade is the smarter investment. It's designed and manufactured specifically for your site — which means better fit, better tension, and longer life.
| Standard Sail | Custom Sail Shade | |
|---|---|---|
| Fits your exact anchor span | Fixed sizes only | ✅ Made to measure |
| Shape options | Square or triangle only | ✅ Any shape |
| Colour choice | Limited range | ✅ Full colour range |
| Longevity | 3–5 years average | ✅ 8–12+ years |
| Best for | Simple rectangular spaces | ✅ Any site, any complexity |
Step-by-Step Sail Shade Setup Instructions
Follow these steps in order. Don't skip the planning or tensioning stages — these are where the majority of DIY errors occur.
Plan your sail shade layout design
Map all anchor positions, measure distances between each point, and plan the height offset between high and low fixings to create your drainage slope. Your sail should be ordered slightly smaller than the anchor span to allow for correct tensioning. Allow at least 200–300 mm clearance from nearby structures. If you get this wrong, the rest of the setup won't perform properly.
Mark your sail shade mounting points
Use a chalk line and tape measure to mark precise fixing positions on each surface. Deliberately offset anchor heights — not all level — to create the required drainage slope of at least 20 degrees across the sail.
Install the mounting hardware
Drill pilot holes using masonry bits matched to your surface. Install eye bolts, pad eyes, or wall plates using dynabolts or concrete anchors. Every fixing must be flush, fully torqued, and load-rated for outdoor tension forces.
Attach the shade sail corners
Connect each corner to its anchor point using stainless steel D-shackles or snap hooks. Leave some slack at this stage — do not begin tensioning yet.
Adjust tension gradually and evenly
Tighten each corner using turnbuckles, working diagonally across the sail. Gradually increase tension until the fabric is drum-tight with no sagging or creasing visible.
Final safety check
Inspect all hardware connections. Confirm no contact with sharp edges, that water will run toward the lowest anchor point, and that all turnbuckle threads are secured with thread-locking compound.
How to Tension a Shade Sail Properly
Tensioning is the most important — and most commonly misunderstood — part of the process. A sail installed with insufficient tension will sag, collect water, and degrade far faster than one tensioned correctly.
"I thought I'd tensioned it properly — but after the first storm, there was a puddle in the middle big enough to swim in." That's a real scenario, and it's more common than you'd think.
Ideal tension level: The shade sail should feel firm across its full surface — minimal give when you press the centre with your palm, similar to a firm trampoline. No section should droop or wave in still air.
Why sagging is a problem: A sagging sail collects rainwater, dramatically increasing load on anchor points and stitching — leading to premature wear, fabric tearing, or anchor failure in severe cases.
Over-tightening risks: Excessive tension strains corner patches, hardware threads, and masonry anchor points. It can also distort the sail's geometry and cause stress cracking around fixings over time.
Sail Shade Setup on Different Surfaces
The anchoring surface determines hardware selection, drill type, and footing depth. Here is how to handle the four most common sail shade setup scenarios. Choose the wrong surface or the wrong anchor and you'll find out the hard way — usually when a fixing pulls clean out of a render wall after a windy afternoon.
🏗️ On Concrete
Concrete is the most reliable anchoring surface. Use a hammer drill with a masonry bit to create pilot holes, then install M12 or M16 dynabolts rated for the expected tension load. Apply thread-locking compound to all bolts and allow anchors to fully set before tensioning the sail.
🏠 Without Posts
If existing structures — house walls, fences, or pergola beams — are structurally sound and correctly positioned, freestanding poles are not required. A tensioned shade sail can exert hundreds of kilograms of force on each fixing point. Consult a structural engineer if structural capacity is uncertain.
🧱 To a House Wall
Fix a pad eye or wall plate into brick using masonry anchors — always drill into brick, never mortar joints. For timber-framed walls, locate studs and use structural outdoor screws. Apply flashing or sealant around wall penetrations to prevent water ingress over time.
🪝 Shade Sail Pole Installation
Where no anchor points exist, steel posts set in concrete footings are the standard solution. Set footings at a minimum depth of 600–800 mm (deeper in sandy soils). Allow 24–48 hours curing before tensioning. Lean posts 5–10 degrees outward to counteract tension forces from the sail.
Best Angle and Height for Your Sail Shade Setup
Recommended slope (20–30°): Every sail shade setup must include adequate drainage fall. It might seem minor, but this step makes a big difference — a flat installation allows water to pool after rain, and even a short shower can add 50–100+ kg of load, enough to tear fabric or rip out anchor fixings. Achieve the slope by deliberately setting anchor points at different heights.
Height guidelines: For residential patios and entertaining areas, maintain a minimum clearance of 2.1–2.4 m at the lowest corner. Higher installations (3 m+) are ideal over pools and open-plan areas, improving airflow and natural light beneath the sail.
Common Sail Shade Setup Mistakes to Avoid
These are the mistakes that most often cause problems in DIY installs — and the ones that lead to callbacks, repairs, or complete reinstallation.
Sail Shade Setup Hardware and Installation Kits
A quality shade sail installation kit ensures all components are matched for load rating and compatibility. A standard residential sail shade setup kit includes:
- Stainless steel D-shackles or snap hooks (one per corner)
- Turnbuckles or rigging screws for tensioning (one per corner, minimum)
- Pad eyes or wall plates for wall and post fixings
- Concrete anchors (dynabolts) or structural timber lag screws
- Safety wire or thread-locking compound for all threaded fixings
For large, complex, or commercial installations, a custom sail shade is the right solution — purpose-designed and engineered for your exact space, with hardware specifications matched to the load, wind exposure, and surface conditions of your site. Sailmaker designs, manufactures, and installs custom shade sails tailored to your space, for residential and commercial clients across Queensland.
Not Sure What You Need? Start Here.
If you've read this far and you're still unsure whether to DIY, what size sail to buy, or whether a standard or custom option suits your space — that's completely normal. Sail shade setups vary enormously depending on the site.
Here's a simple way to think about it:
Sailmaker has been helping Queenslanders answer exactly these questions for over 25 years. Whether you need a quick recommendation or a full custom quote, our team can assess your space and tell you exactly what will work — and what won't. There's no obligation, and no guesswork.
Frequently Asked Questions
Need a Professionally Engineered Sail Shade Setup?
Sailmaker has been delivering expert sail shade installation and custom sail shade solutions for over 25 years. From residential backyards to commercial sail shades Brisbane, our team handles every project end-to-end.
Sailmaker — 3/80 Ebbern St, Darra QLD 4076Contact us for a tailored consultation.

Comments
Post a Comment